“There is no such thing as waste, just stuff in the wrong place”
~ Anonymous
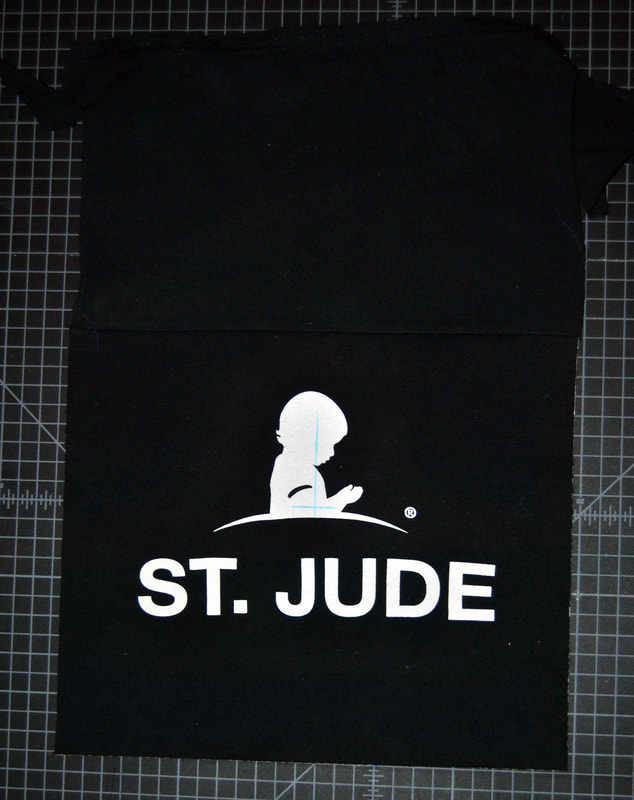
In the true fashion of Nifty Thrifty, I decided to take a chance and try something new. My friend had a lot of volunteer shirts and didn't know what to do with them. Rather than throwing them away or donating them, I thought it would be a great idea to turn something old into something new and make a memorable quilt.
Below is step by step instructions on how to make your own. If you're not into crafts but would still like one made send me a message to discuss pricing and how to send your shirts.
Below is step by step instructions on how to make your own. If you're not into crafts but would still like one made send me a message to discuss pricing and how to send your shirts.
What You'll Need...
More like what I used to make this oh so great Quilt
- Scissor
- Fabric Marker
- Interface (Optional)
- Batting
- Large Safety Pins
- Iron & Ironing Board
- Thread ~ Clear thread and Thread To Match the Fleece
- Fleece for the backing
- Sewing Machine
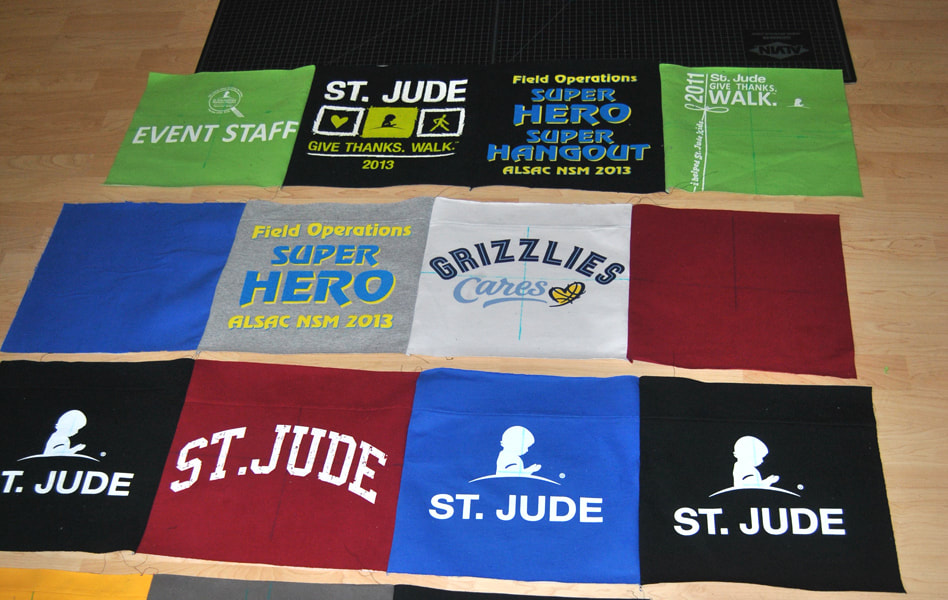
Step 1: The Count Matters
 | To start you'll need to go through your pile of shirts and organize them based on color and/or designs. The quilt size is determined by the number of shirts available. The sizing can vary from an even design (4x4, 6x6, etc) to uneven design (4x5, 6x7, etc.). It's really up to you With the amount of shirts I had on hand, I decided to design a 4 (column) x 5 (rows) quilt to achieve the largest quilt possible.. |
Step 2: Cut It Up
| The goal is to keep as much fabric as possible! Cut along the side seams, around the arm holes and along the shoulder area. At the end of this step you should have two usable pieces (front piece and back piece). Make two separate piles... One for usable fabric and another pile for scrape pieces | 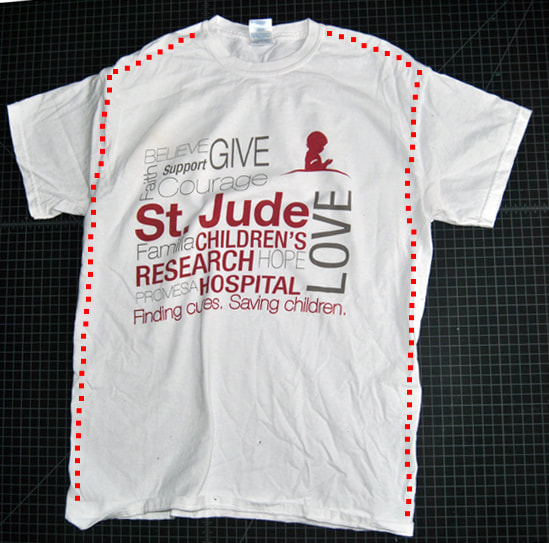 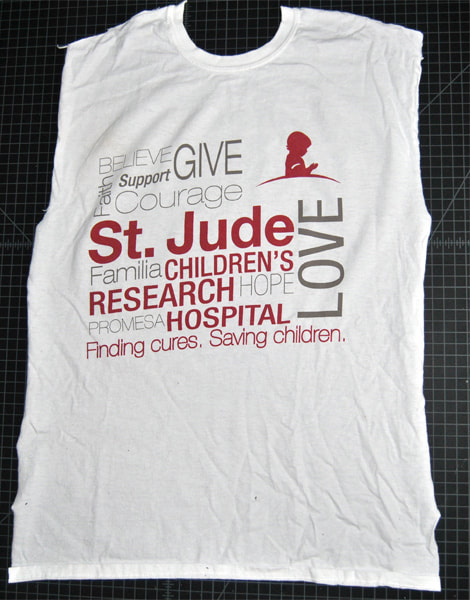 |
Step 3: [Inter]Face It
 | Helpful Hint: I find that Interfacing the shirts before cutting out the tiles makes it easier to move on to step #4. This step is optional but HIGHLY recommend it. Interface helps stabilize the t-shirt fabric meaning that it won't stretch as much. How to interface: Place the fabric face down on your ironing board. Then place the bumpy side of the interfacing down of the interfacing on the fabric (you can feel the difference). Using your iron on the highest steam setting, begin steaming (fusing) the interface to fabric. You should leave the iron on the interfacing for 10 seconds before moving to the next section. |
Stabilize the area that will be used in the square per quilt. As you can see, I only interfaced the area between the dotted lines.
After you're done interfacing everything, you should have something like this ....

Step 4: Determine The Center & Cut The Tiles
Part A. Center Point
What you'll need: Fabric Marker (water or air soluble)
What you'll need: Fabric Marker (water or air soluble)
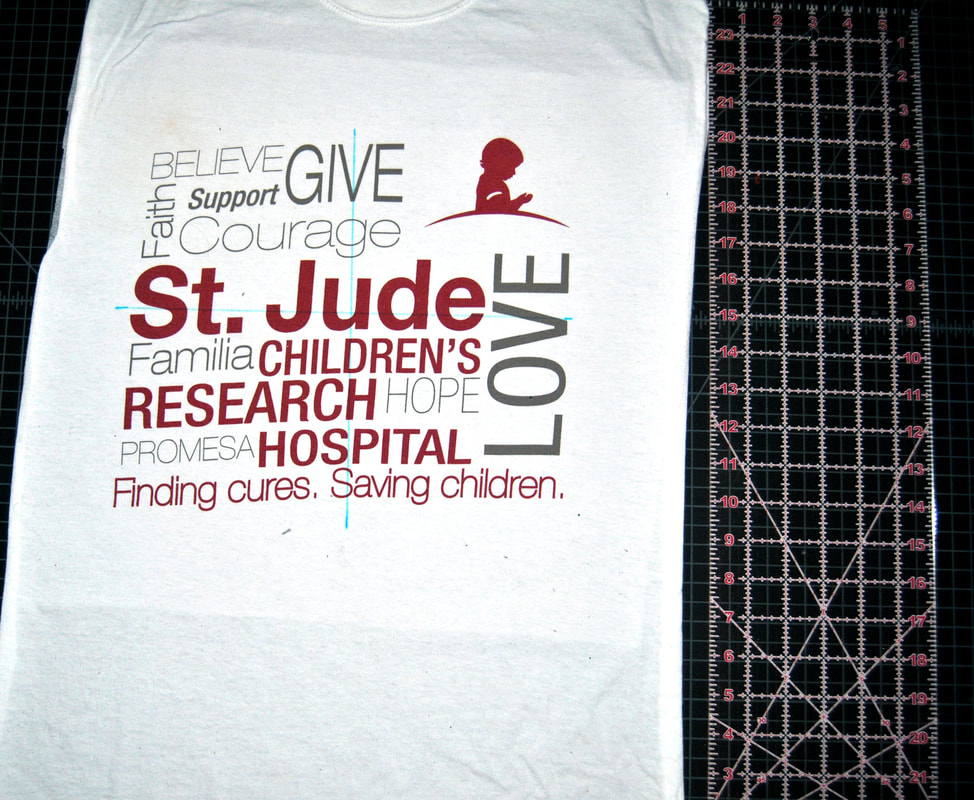
1. Place your ruler vertically along the height of the logo making sure that you include the highest and lowest point of the design.
The shirt below happened to be a square design which is easier to determine the high and low points. The height of this logo is approx. 10".
2. Divide the height by 2 to find the midpoint.
The middle of the height for that shirt is 5" for this shirt.
3. Using your Fabric Marker, mark the mid point on both sides.
4. Rotate the shirt and repeat steps 1-3.
5. Using your ruler, place the ruler to connect the marks you created. You want to make sure it's a straight line.
The horizontal blue line going through the St. Jude would be the midpoint for the height.
6. Rotate the shirt and repeat step 5.
The vertical blue link is midpoint for the width
The point where the 2 lines cross/intersect is the middle of the logo.
Please keep in mind, that not all shirts are created equally.
The larger size shirts(Large & up), the better for t-shirt quilts... It's more room for error.
Don't Worry... Smaller shirts work too. You just have to be precise when cutting.
Part B. Measurements Required
Put Your Scissors down... DON'T START CUTTING JUST YET
Helpful Hint: I pulled 2 shirts to help determine the measurements of each tile . The first shirt had the largest logo and the second shirt was the smallest shirt size.... In my case, it was youth large.
The largest logo on the shirts provided for my quilt was 10"x 12". To ensure that smallest shirt had enough fabric, I measured 10" x 12" on the smallest shirt. Sometimes the shirt will not have enough to cut the squares which perfectly fine. That's were the scrap pieces come in handy ... I 'll get to that in a little bit.
For my quilt, I wanted an inch border around the design so I added 2" to the width and height. I made a note of how larger I wanted each tile to be. My final number was 12-3/8" x 14-3/8" . The 3/8" is the seam allowance needed to sew the squares together.
Part C: Cutting
What You'll Need: 2 rulers and scissors
Please Note: Insert your measurements in this section.
What You'll Need: 2 rulers and scissors
Please Note: Insert your measurements in this section.
1. Place your ruler flush on the horizontal line drawn on your shirt.
2. Measure 6-3/8" from that line ( 6" multiplied by 2 is 12" with an additional 3/8" for seam allowance included).
3. Holding the ruler in place, cut along ruler.
4. Again, place your ruler flush along the horizontal line drawn on your shirt
5. Measure 6"3/8" in the opposite direction.
6. Holding the ruler in place, cut along the ruler
7. Rotate the shirt to cut the width of the shirt and repeat steps 1-6.
8. Place your ruler flush on the horizontal line you drew
9. Measure 7-3/8" from the line (7" multiplied by 2 is 14" with an additional 3/8" for your seam allowance)
10. Holding the ruler in place, cut along your ruler
11. Again, Place your ruler flush along the horizontal line drawn on your shirt
12. Measure 7-3/8" in in the opposite direction on the bottom half.
13. Holding the ruler in place, cut along the ruler.
14. All four sizes should be cut. You now have a square/tile.
In an ideal world every shirt would make the perfect square tile but you might have a smaller shirt that's short on fabric in either direction.
This happened to me mainly when cutting the top of the square for the smaller shirts but luckily I held on to my scraps.
This happened to me mainly when cutting the top of the square for the smaller shirts but luckily I held on to my scraps.
Part D. Correcting the Cut
Adding Fabric to the short side.
 |  |
1. Place the shirt the logo face up
2. Locate the scrap of that shirt and place face down on the square and pin taking into account the seam allowance of 3/8"
3. Head to your sewing machine and sew the two pieces together.
4. Open the pieces and press the seam with an iron to flatten the seam
5. Repeat steps 1-3 of Part C.
6. You have successfully added fabric to your tile.
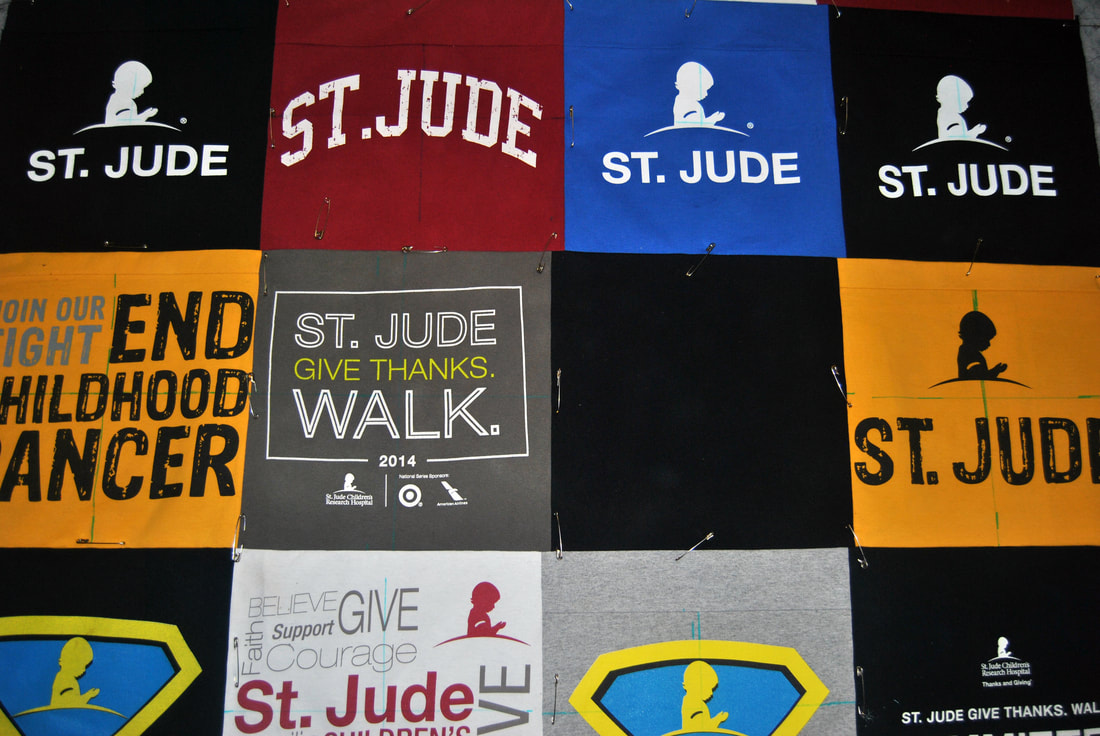
Step 5 : Piece It Together
Here's the fun part... Figuring out your design
My Recommendation: Layout your first design, then step away. I promise, you'll change your design 2 or 3 times with ever revisit but you'll be happy with your final result
Once you have locked in your design, take a picture as a reference image.
My Recommendation: Layout your first design, then step away. I promise, you'll change your design 2 or 3 times with ever revisit but you'll be happy with your final result
Once you have locked in your design, take a picture as a reference image.
Step 6: Sew Something
Now is the time to bring out the sewing machine.
- To begin sewing, decide if you want to sew the squares in the columns then rows or rows then the columns. For this quilt, I sewed the rows then columns.
- Pin the first and second square of the row or column together with right sides together. (Right sides are together. Sew along the seam allowance line. For my quilt it was 3/8"
- Repeat this step until the entire row or column is sewn together. Repeat this step for each column or row.
- At this point, you'll have x amount of strips of rows or columns. Placing the right sides together of each strip, pin and sew along the seam allowance. Repeat until all the columns and rows are connected.
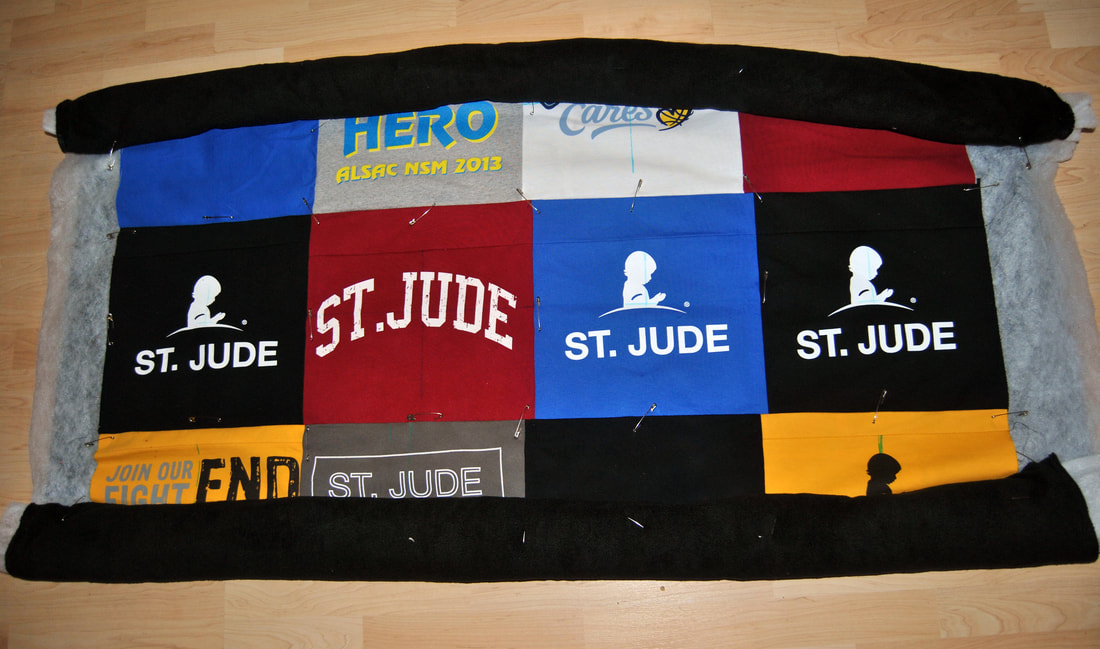
| | Adding the Backing and the Batting What You'll Need: Fabric, Batting, Large Safety Pins and Clear Thread
|
- Re-thread your machine to switch the top thread to clear thread. The solid thread in the bobbin should match your fabric backing.
Helpful Hint: Use thread to match the fleece backing in the bobbin.
- Starting in the middle and working your way out, sew each row or column along the t-shirt seam lines making sure to sew all three layers together (see image below)
- Repeat the previous step until all the rows and columns are sewn together
- Roll the edges and pin. Head to the sewing machine on the edge to finish it out
Step 7: The Finishing Touch
Wash and dry your blanket to remove any water soluble ink and, also, to test the durability of the blanket.
I know this is a wordy post so feel free to email me if you have any questions or run into any issues.

 RSS Feed